Hacky Holidays Guide
Hacky Holidays is a limited-time YSWS event for making your own PCB tree decorations! There are 3 major steps in making a successful decoration:- Choosing your Parts
- Designing your PCB
- Programming your PCB
Choosing Your Parts
When choosing your parts, think about the function of each component, and try to wither out unneeded components. Unneeded components can reduce your decoration’s battery life! Parts covered in the guide**:**- Neopixels (4 pin)
- Xiao ESP32C3
- Battery Holder
- resistors/diodes
Designing your PCB
For this guide, we are going to be using KiCad, so if you are using a different tool your steps might be a bit different! First, open up KiCad, and go to File → New Project… and name it whatever you want! Just make sure you name it something you remember so you can come back to it! Then Click on the Schematic Editor Button. It will take you to a blank page where you will start designing your PCB!

Importing Footprints
The first thing we’ll need to do is import the Xiao ESP32C3 into KiCad. First, download this file, and drag it into your project folder. Go to your KiCad project menu, and open up the footprint editor. ClickFile → Import → Footprint, and select the Xiao ESP32C3. Save it using ctrl + S. It’ll ask you to select a library to put it in, click new library and name it something like xiao(.pretty).
Next, download this file, and put it in your .pretty folder. Open up the schematic editor, click Preferences→ Manage Symbol Libraries → Add Existing Library to Table(Folder Icon) → File you just downloaded.
Once you are in, press the A key on your keyboard. This should open up a menu where you can add add components. Search for the following and add them to your schematic:
- XIAO-ESP32-C3-SMD (x1)
- WS2813B (x6)
- Battery Cell (x2)
- Diode (x2)
Note on LEDs:
We are using daisy-chainable neopixels. This means that we can link all of the LEDs in series, and then control all of them through a PWM signal from our board. This helps us save a lot on pins and allow for the addition of more LEDs!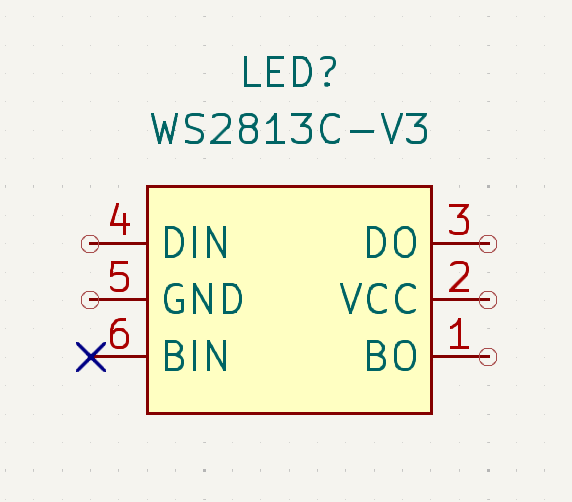 Now that we have all of our components on our schematic, it should look something like this:
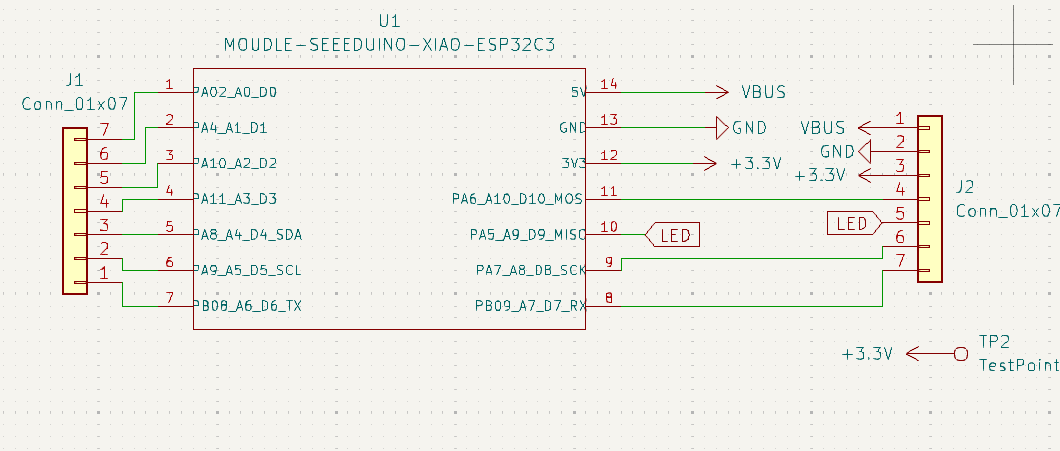
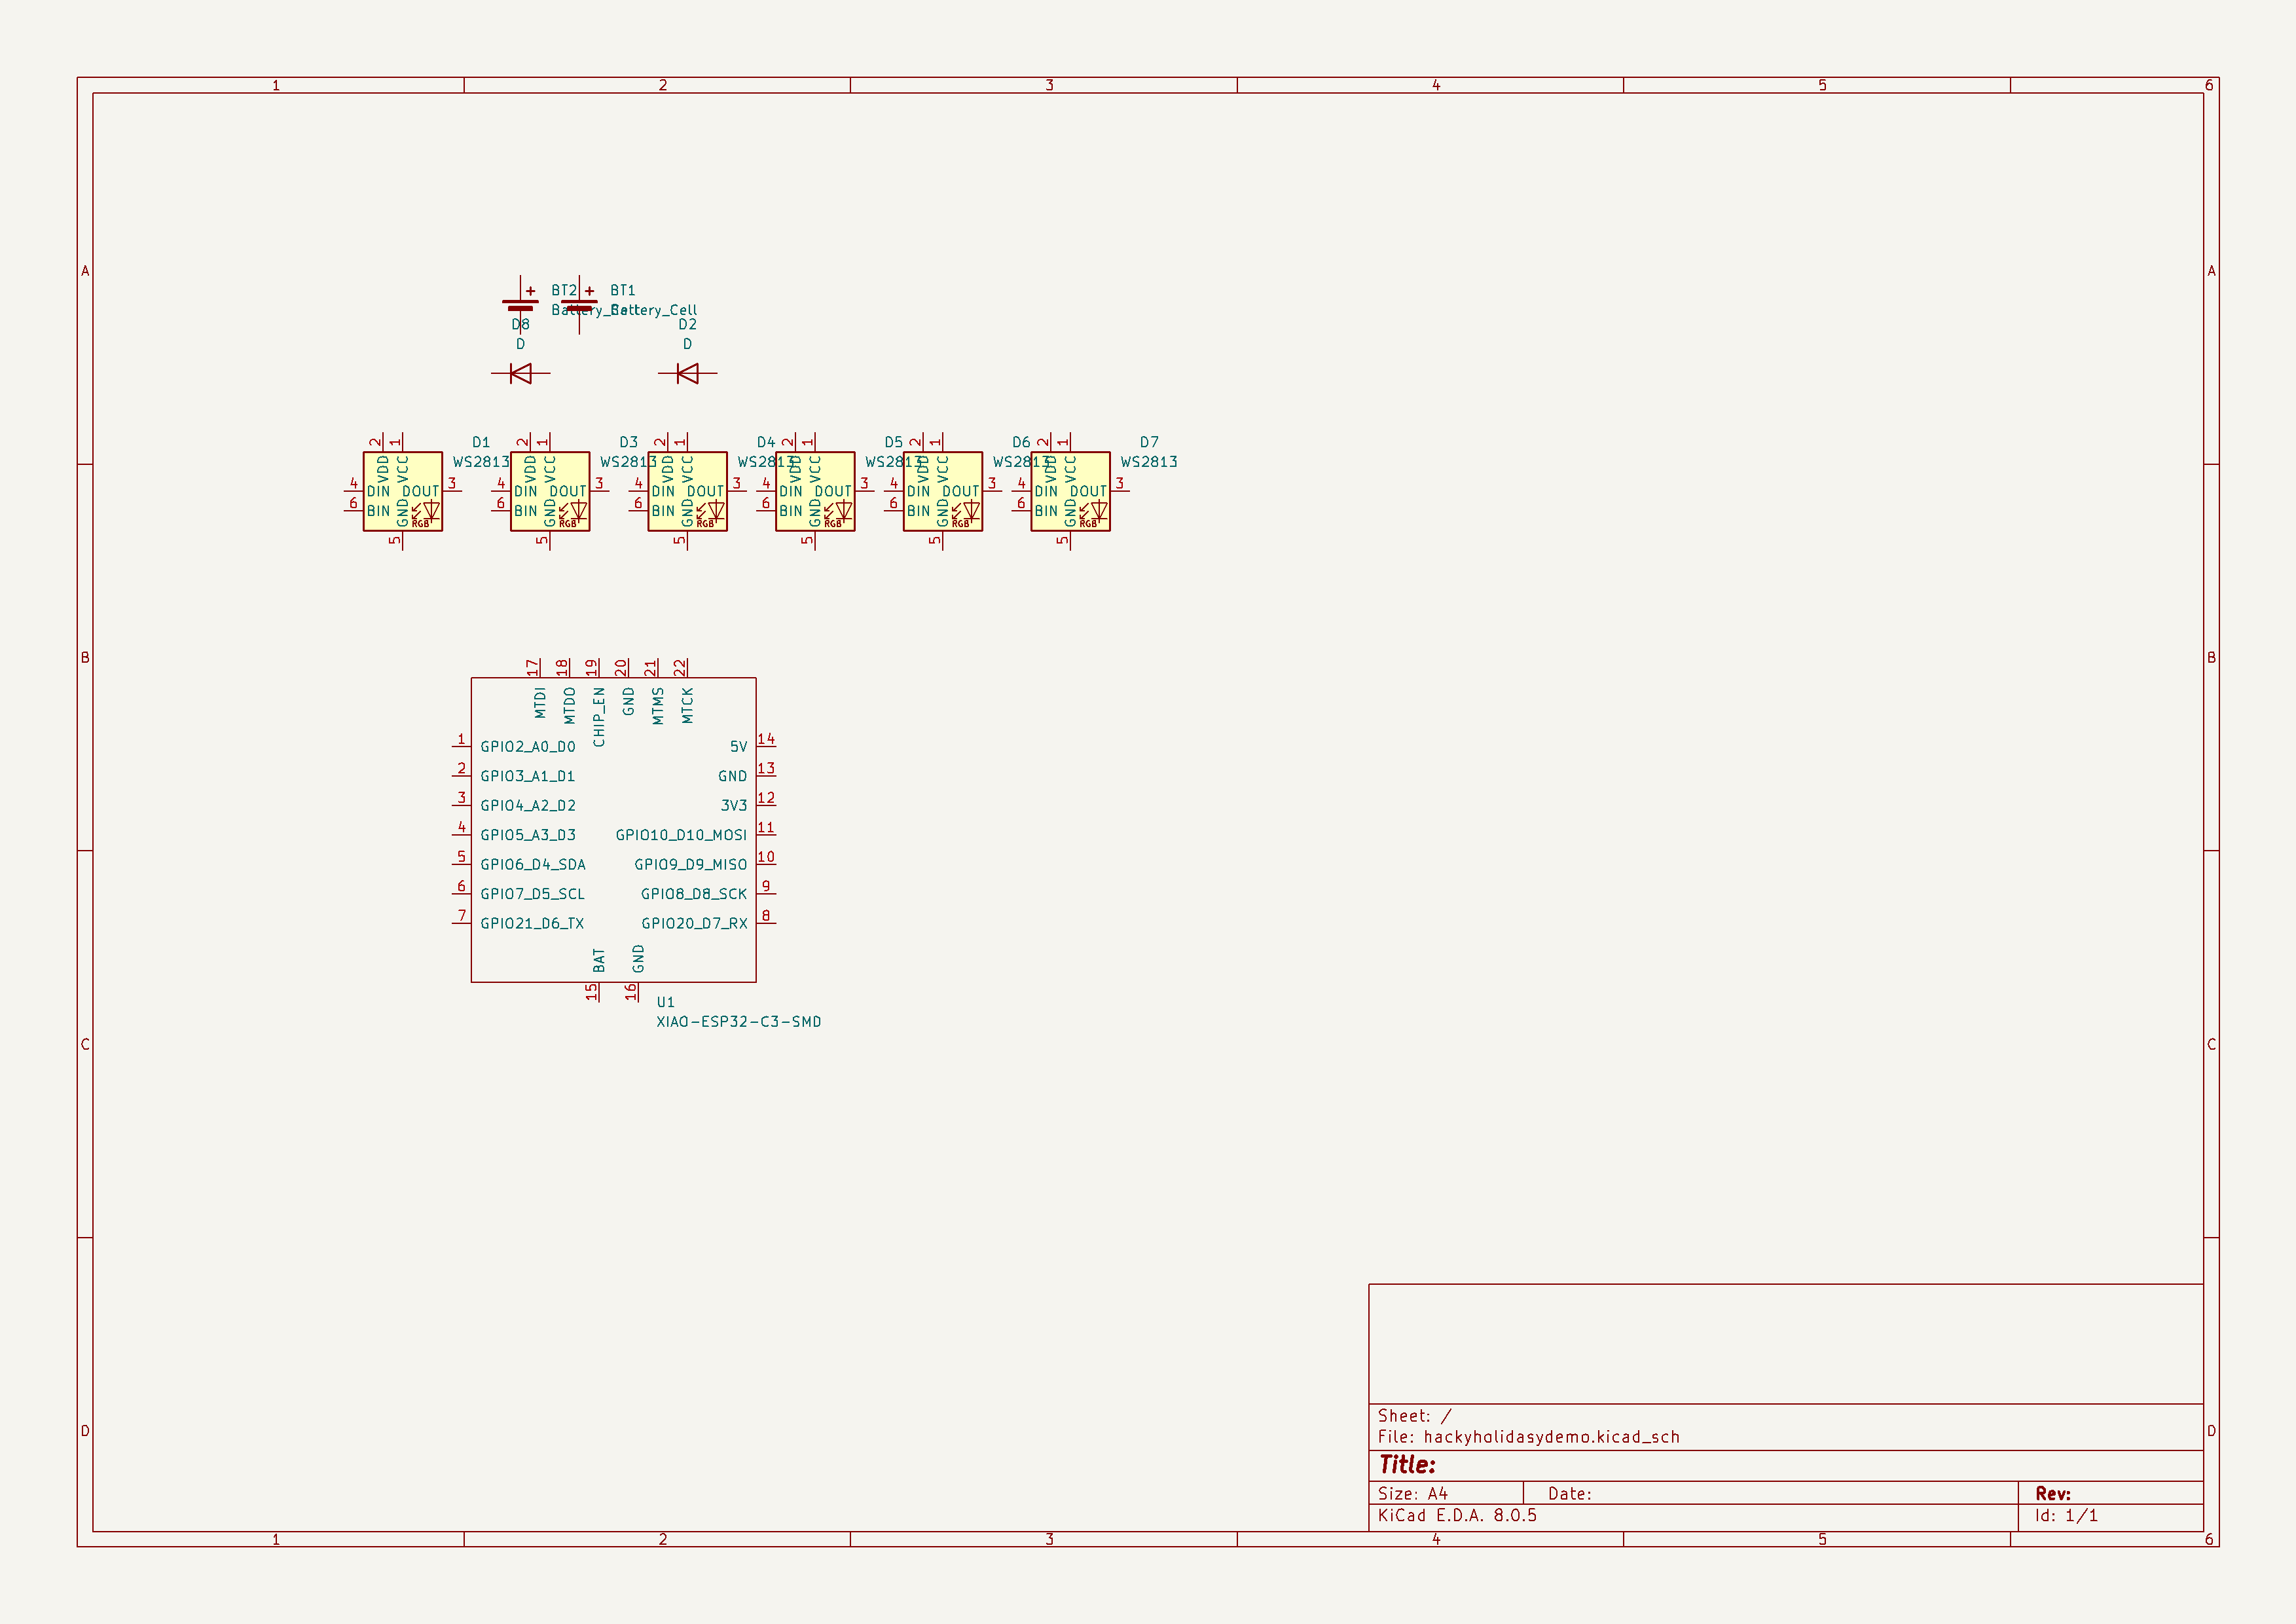 Now press W on your keyboard, which will allow you to wire your PCB! Click on the pins and move your mouse to wire your components together. Connect your components as follows in the schematic:
LEDS:
 XIAO:
XIAO:
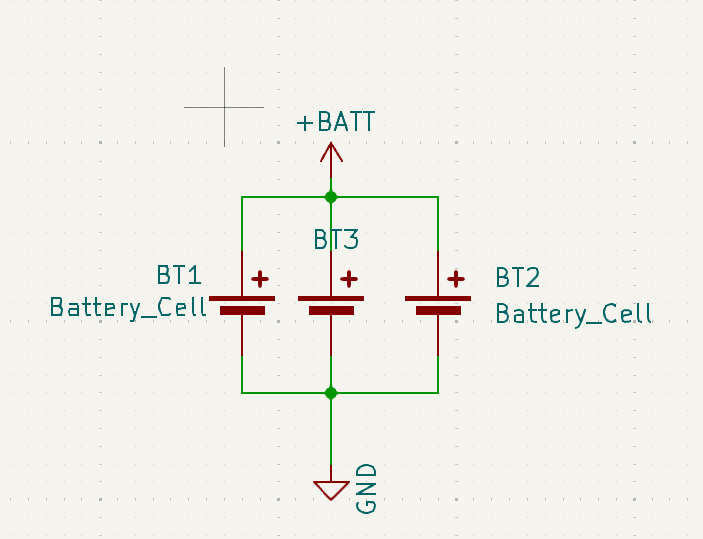
 Battery:
 Regulator and Charger(Optional):
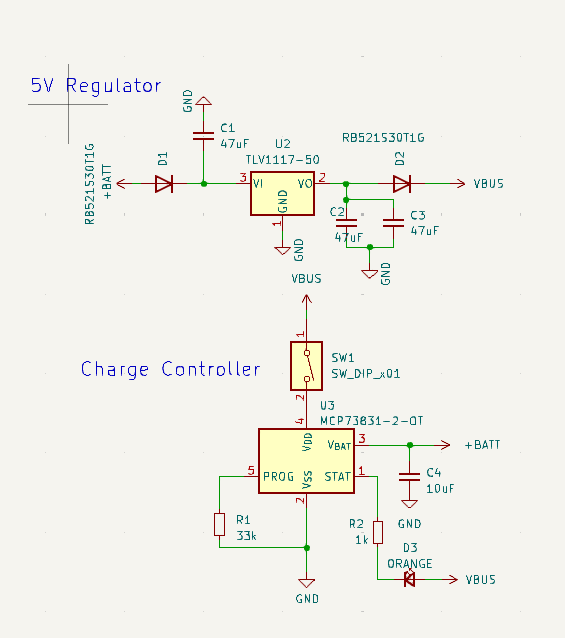 Now that we are done wiring up the PCB, we can start designing & routing it!
Programming your PCB
To program your PCB, use the Arduino IDE and the Neopixels library! Here is a helpful resource to help you get started: https://learn.adafruit.com/adafruit-neopixel-uberguide/arduino-library-use To simulate your code, you can use WokwiSubmissions & Manufacturing
Once you are ready to submit, create a PR in OnBoard with the Hacky-Holidays tag and submit your PR to this form! PRs must include multiple things:- Schematic of your Board
- Link to Wokwi with the board working
EXT. General Info How to wire up your LEDs